
Is your table looking a little tired? Before you start thinking about the cost and hassle of buying a new one, consider a vinyl wrap for a table top. It's a surprisingly simple way to get a high-end, custom look without the mess or the big price tag. You can completely change the vibe of your furniture and give it a fresh, modern surface.
Instantly Refresh Your Furniture with a New Surface
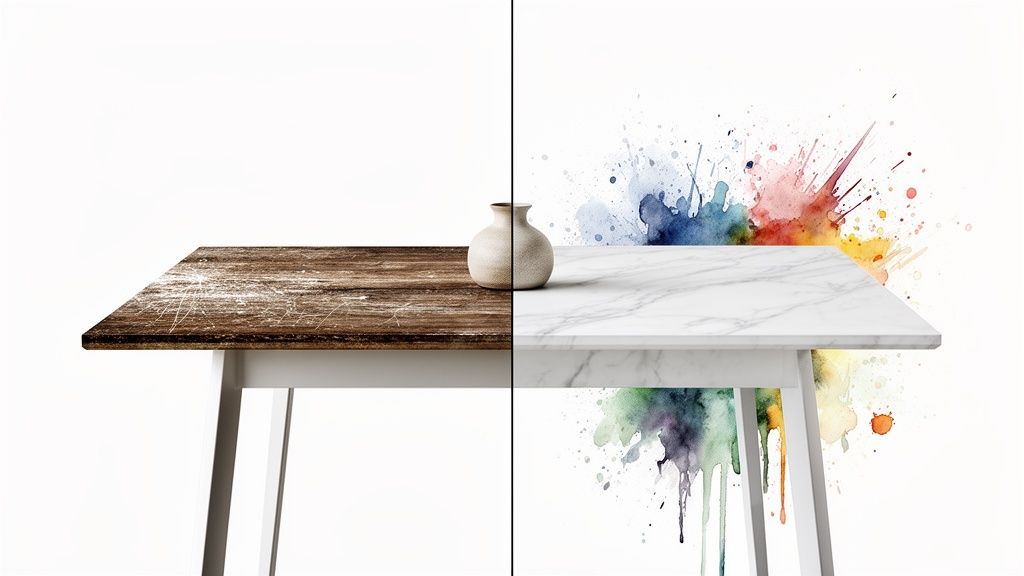
Imagine it: that scuffed-up coffee table or dated dining room surface could become a showstopper in a single afternoon. That's the magic of architectural vinyl wrap. It’s a smart, creative way to breathe new life into any room in your house.
This is about more than just hiding a few scratches. It's your chance to get creative. With hundreds of finishes available—from convincing wood grains and luxurious marbles to smooth, matte colors—your design options are wide open.
The Smart Choice for Modern Interiors
A vinyl wrap from ReVamp Wrap isn't just a pretty face. It's a tough, protective layer that can handle the rigors of daily life, which makes it perfect for tables that see a lot of action. It's quickly becoming the go-to choice for savvy homeowners for a few key reasons:
- It's Cost-Effective: You can get the look of pricey materials like solid wood or real marble for a tiny fraction of the price.
- There's Minimal Disruption: The whole process is quick and clean. No sanding dust, no loud power tools, and no waiting for paint to dry.
- It's Surprisingly Durable: Good quality vinyl is built to resist scratches, moisture, and stains, which helps your furniture last even longer.
- It's a Sustainable Choice: Why throw out a perfectly good piece of furniture? Upcycling is a much more eco-friendly option.
When you're looking for stylish and budget-friendly ways to refresh your space, vinyl wrapping fits right in. Exploring different strategies for decorating your home on a budget can give you even more great ideas to pair with your project.
This guide is here to walk you through exactly how to get a professional-looking finish. Whether you've done a ton of DIY projects or this is your first one, you'll have everything you need to start with confidence. For even more ideas, check out our in-depth guide on the benefits of wrapping furniture.
Choosing the Perfect Vinyl Finish and Style
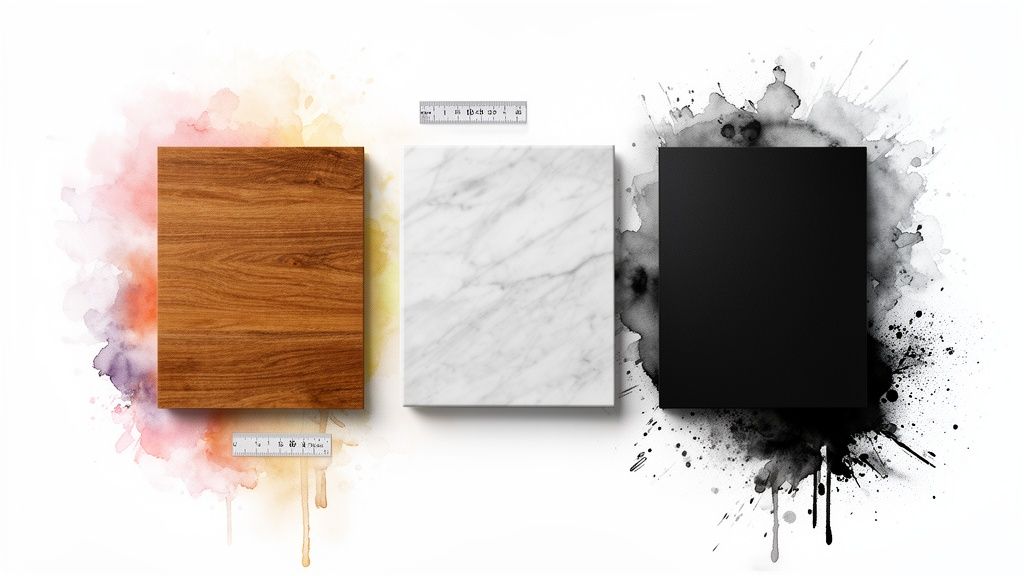
This is the fun part. Choosing a vinyl wrap for a table top is where you get to play designer and bring your vision to life. It’s about so much more than just picking a color; you're setting the entire mood for the room. The finish you land on can make a space feel cozy, sleek and modern, or elegantly timeless.
Think of the vinyl as the final, defining layer of your room's personality. A stunning Calacatta marble wrap can instantly make a simple kitchen island look like a luxury centerpiece. On the other hand, a rustic oak wood grain finish has the power to turn a generic dining table into the warm, inviting heart of your home.
Finding Your Design Direction
Before you get lost in a sea of samples, take a moment to think about the atmosphere you're trying to create. Are you going for a minimalist Scandi vibe, a bold industrial look, or something more classic? If you're not sure where to start, browsing a good interior design styles guide can help you lock in a direction. This step makes all the difference in ensuring your newly wrapped table feels right at home.
Once you have a style in mind, you can start exploring the finishes that will really bring it to life. We often work with three main types:
- Matte Finishes: These offer a soft, non-reflective surface that's fantastic at hiding fingerprints and small imperfections. They’re perfect for a contemporary, understated look.
- Gloss Finishes: High-shine and reflective, a gloss finish bounces light around the room, making any space feel brighter and more open. It’s a go-to for a modern, glamorous effect.
- Textured Finishes: Finishes like wood grain, brushed metal, or leather add a tangible depth that you can actually feel. This little detail creates a much more immersive and high-end result.
To make it even easier, here’s a quick breakdown to help you match a finish to your project's needs.
Vinyl Finish Selection Guide
Compare popular vinyl finishes to find the perfect look and feel for your table top project.
| Finish Type | Best For | Aesthetic Feel | Durability Level |
|---|---|---|---|
| Matte | Desks, coffee tables, high-use surfaces | Modern, subtle, sophisticated | High (hides minor wear) |
| Gloss | Kitchen islands, side tables, accent pieces | Sleek, glamorous, bright | Medium (shows scratches more) |
| Wood Grain | Dining tables, consoles, furniture | Warm, traditional, rustic | High (texture conceals use) |
| Metallic | Accent tables, decorative features | Industrial, chic, edgy | Medium-High |
| Stone/Marble | Kitchen counters, vanities, dining tables | Elegant, luxurious, classic | High |
Ultimately, the best choice depends on how you use the table every day. A high-traffic dining table will need a more forgiving finish than a decorative side table.
Understanding Vinyl Types for Durability
Looks are important, but durability is what makes a wrap a smart investment. The type of vinyl you choose plays a huge role in how long your table top will look great, especially in busy spots like the kitchen or dining room.
High-quality architectural vinyl is engineered to handle daily life. In a fast-paced environment, a well-installed wrap can last 5-10 years, resisting heat up to 60°C and offering up to 95% UV fade resistance. Monomeric vinyl is a popular choice because its flexibility is perfect for conforming to the curved edges you often find on tables and vanities.
Pro Tip: For surfaces that see a lot of action—think coffee tables where keys are tossed or dining tables that double as homework stations—I always recommend a vinyl with a higher thickness and a protective top coat. It's a small detail that adds a serious layer of defense against scratches and scuffs.
Matching the Finish to the Function
Let’s talk through a few real-world scenarios. Say you’re updating a desk in your home office. A matte black or a subtle linen-textured vinyl can reduce glare from overhead lights, making it much easier on your eyes during a long workday.
For a family dining table, a durable wood grain vinyl is a fantastic choice. Not only does it have a classic appeal, but its texture is also brilliant at camouflaging the minor wear and tear that comes with daily family meals.
And if you love the look, why stop at furniture? These same materials can transform your walls, too. You can check out our guide on using vinyl for wall coverings to see how you can create a cohesive look throughout your space. The right vinyl doesn't just change a piece of furniture; it redefines the entire room.
Getting Your Gear Ready for a Flawless Finish
Before you even think about unrolling that beautiful new vinyl, let's talk about your setup. Having the right tools on hand is the secret sauce to a professional-looking wrap. It’s what turns a potentially frustrating project into a smooth, satisfying experience.
You don’t need to raid a hardware store. Most of this stuff is simple, but each item plays a crucial role. Think of it as your application arsenal—get this ready, and you're already halfway to a perfect finish.
The Must-Have Toolkit
You've probably got most of these items lying around the house. The goal here isn't to spend a lot of money; it's to be prepared. Here's your go-to checklist:
- Measuring Tape: This is non-negotiable. Measure your surface once, then measure it again. A little extra vinyl is a safety net; too little is a disaster.
- Sharp Craft Knife or Scalpel: Don't even try this with a dull blade. A fresh, sharp edge is the only way to get those clean, crisp cuts. A blunt one will just snag and tear the vinyl, wrecking your hard work.
- Felt-Edged Squeegee: This will be your best friend. The soft felt side glides over the vinyl, pushing out air bubbles without a single scratch. A hard plastic scraper can easily mar the finish you're trying to perfect.
- Heat Gun or Hairdryer: Absolutely essential for corners and curves. A bit of heat makes the vinyl pliable, almost like magic, letting you stretch it just enough to hug every contour for a shrink-wrapped look.
- Cleaning Solution & Microfiber Cloth: Your surface needs to be surgically clean. We use a simple 50/50 mix of isopropyl alcohol and water. It cuts through any lingering grease or grime that could stop the adhesive from getting a good grip.
At ReVamp Wrap, this is pretty much the exact kit our pros carry. It’s not about having a hundred fancy gadgets. It’s about knowing why each simple tool is critical for achieving that premium, seamless look.
A Closer Look at Your Most Important Tools
Let's zoom in on a couple of these items, because they really are game-changers.
That felt-edged squeegee? It's the difference between a bubbly, amateur job and a perfectly smooth surface. The felt lets you apply firm, even pressure to work out every last air pocket without damaging the vinyl's finish. It's a small detail that makes a huge impact.
And the heat gun is what lets you master tricky shapes. Trying to wrap a rounded edge without heat is a recipe for creases and frustration. But with a little warmth, the material relaxes and becomes workable, conforming beautifully to any curve you throw at it. Getting these basics right from the start is what sets you up for success.
A Practical Guide to Wrapping Your Table Top
Alright, this is where the magic happens. We've picked out the perfect finish and have our tools ready, so let's get to the fun part—actually applying the vinyl wrap for your table top. Think of this less as a major construction job and more like a satisfying craft project. The secret to a fantastic result is just a bit of patience and working step-by-step.
We'll walk through this together, starting with the crucial prep work and finishing with that final, clean trim. My best advice? Don't rush it. A little care at each stage pays off big time and gives you a finish that looks genuinely professional.
The Foundation: A Perfectly Prepared Surface
You’ll hear this from every single installer, and for good reason: your wrap is only as good as the surface it’s stuck to. Even a tiny speck of dust or a smudge of grease can create a noticeable bump or, worse, stop the adhesive from bonding properly. A flawless finish begins with a perfectly clean base.
So, before you even think about unrolling the vinyl, give your table a deep clean. A simple 50/50 mix of isopropyl alcohol and water in a spray bottle is the industry standard. It cuts through grime and evaporates without leaving any residue, which many household cleaners are guilty of.
Spray the whole surface down and give it a firm wipe with a clean, lint-free microfiber cloth. Really focus on the edges and corners, as that's where oils from hands tend to build up. When you're done, run your hand over the top—it should feel squeaky clean and totally smooth.
Measure Twice, Cut Once
Now it’s time to measure. A little precision here saves a lot of frustration (and wasted vinyl) later. Measure the length and width of your tabletop, then add an extra 10-15 cm of overhang to every side. This extra material is your safety net. It gives you something to grip during application and ensures you have plenty to cover the edges cleanly for that seamless look.
With your measurements handy, roll out the vinyl on a clean, flat surface, making sure the paper backing is facing up. Use your tape measure and a pencil to mark your cutting lines on the grid you'll find on the back. A straight edge, like a long ruler, will be your best friend for getting a perfectly straight cut.
Expert Tip: Always, and I mean always, use a fresh blade in your craft knife for cutting. A dull blade is the enemy—it will snag and tear the vinyl, leaving you with a jagged, amateur-looking edge. A sharp blade glides right through, giving you a crisp, clean line every time.
The Application Dance: Positioning and Smoothing
This is the moment of truth. With your vinyl cut to size, it's time to get it on the table. The biggest mistake people make is peeling off the entire backing and trying to lay it down in one go. That's a surefire recipe for creases and bubbles. Instead, we’re going to use a pro technique called the "hinge" method.
Start by laying the vinyl piece on the table, positioning it perfectly with the overhang you measured. Now, peel back about a third of the backing paper from one end and fold it back over itself, creating a neat crease. This exposes a manageable section of adhesive to work with.
Press this exposed section down firmly onto the table surface. This is your anchor, your "hinge." Now, grab your felt-edged squeegee. Starting from the very center of your anchored section, use smooth, overlapping strokes to work the vinyl down, pushing from the middle out toward the edges. This forces any trapped air out from under the film.
With one hand, start to slowly and steadily pull the backing paper out from under the vinyl. At the same time, follow right behind it with your squeegee in the other hand, continuing those firm, center-out strokes. You want to keep the vinyl taut, but don't stretch it. The goal here is a controlled, steady application, not a race.
This whole process really comes down to three key actions.
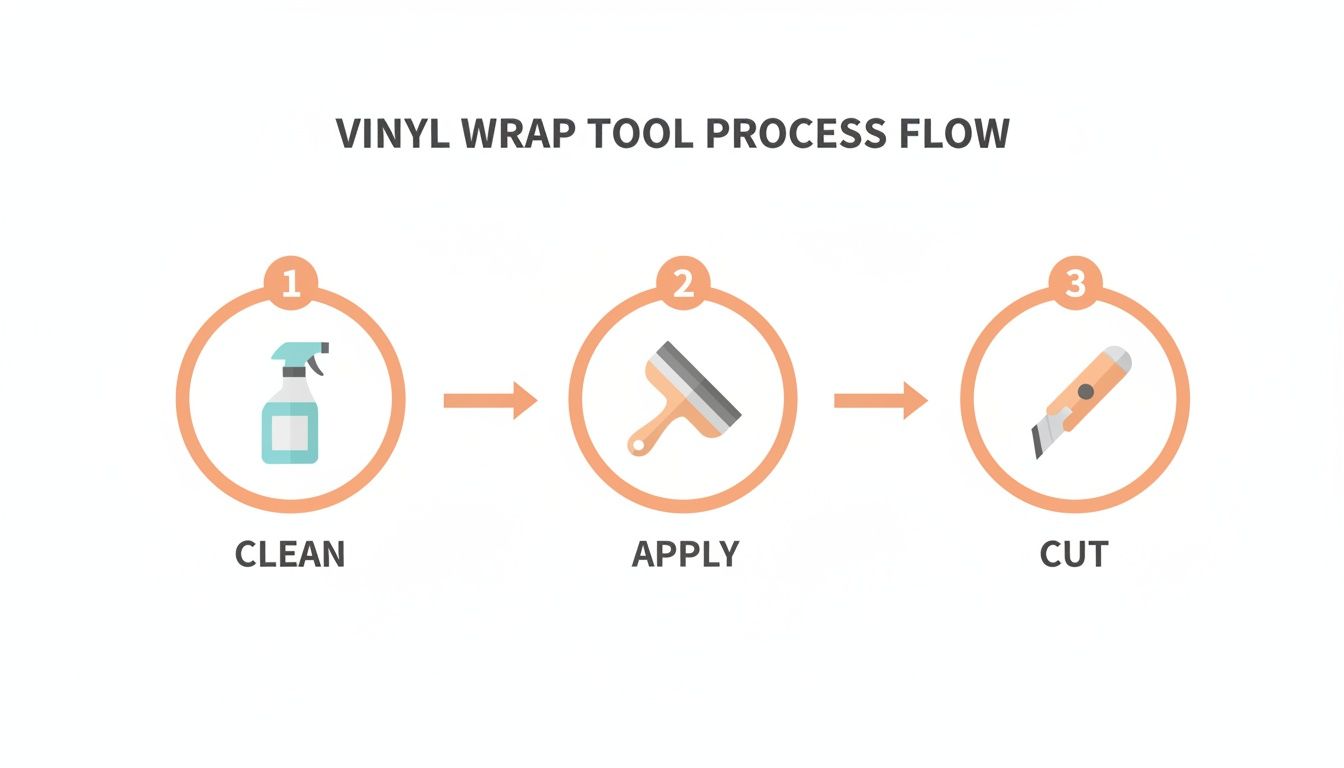
This workflow shows how a professional result comes from methodical preparation, careful application, and a precise finish.
Troubleshooting on the Fly
Even the pros get an occasional air bubble, so don't panic if one pops up! It’s completely normal and easy to fix. If you see it right away, you can usually just gently lift the vinyl back past the bubble and re-apply it, smoothing it out with your squeegee. The adhesive on quality architectural vinyl is designed to be repositionable for a few minutes.
But what if you spot a bubble after you’ve already smoothed down a large area? No problem. Here’s a little trick of the trade: take a very fine pin or the sharp tip of your craft knife and make a tiny puncture right in the middle of the bubble. Then, use your finger to gently press the trapped air out through that tiny hole. On most finishes, especially textured ones, the hole will be completely invisible.
Following this process ensures your vinyl wrap for table top looks seamless, transforming your old furniture into something new and stunning. Up next, we’ll get into the part that truly makes a project shine—mastering those tricky corners and edges.
Getting Those Corners and Edges Just Right
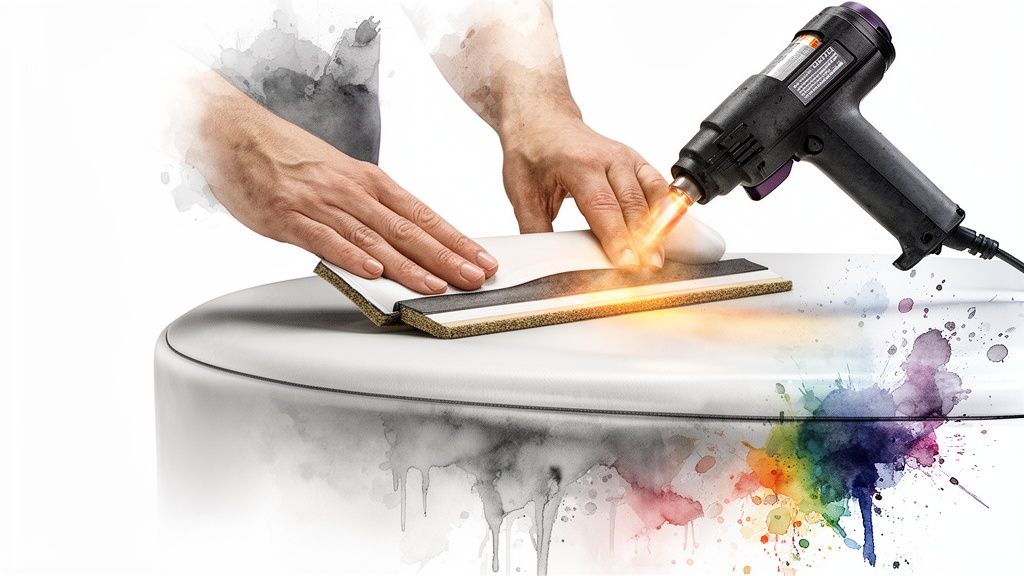
Here's a little secret from the pros: the real difference between a DIY project and a professional job is all in the details. You can get the tabletop surface perfectly smooth, but if the corners and edges aren't sharp, the whole thing just looks… off.
This is the part that trips most people up, but it doesn't have to be intimidating. With a bit of heat and a couple of smart techniques, you can get a flawless, factory-finish look. Let's break down how the team at ReVamp Wrap turns those tricky spots into the best part of the project.
Tackling Sharp 90-Degree Corners
If you're working with a standard square or rectangular table, the goal is to get a clean, sharp corner without any ugly, bunched-up vinyl. The trick is a simple "relief cut" that lets you manage the extra material perfectly.
Think about the corner you're covering. You have two flaps of vinyl hanging over the edge that need to come together neatly. Here’s the process:
- Fold one side down: Start by smoothing the vinyl down over one edge. Tuck it under and press it firmly against the underside of the table.
- Make the relief cut: Now, look at the other flap of vinyl. Grab your craft knife and cut it at a 45-degree angle, starting right at the corner and cutting outwards. This little snip removes the excess material that would cause a bulge.
- Fold and finish: With the extra vinyl gone, you can now fold the second side down. That 45-degree cut lets it lay perfectly flat against the first piece, creating a crisp, almost invisible seam.
This method avoids the common mistake of trying to fold the corner in on itself, which always leaves a thick, rounded edge.
Mastering this simple cutting technique is a game-changer. It’s the secret to making your vinyl wrap conform perfectly to the table’s original shape, ensuring the final result looks like a custom finish, not a cover-up.
Conquering Rounded Edges with Heat
Rounded corners and curved edges call for a completely different playbook. Instead of cutting, you need finesse—and your heat gun is the star player. A little bit of heat makes the vinyl soft and stretchy, almost like magic, allowing you to mold it around any curve.
Gently warm the vinyl at the corner. The key is to keep the heat gun moving so you don't scorch or melt any one spot. You'll literally feel the material relax and become pliable.
Once it's soft, use your fingers to gently pull and stretch the vinyl around the curve, smoothing it down as you go. Work in small sections at a time—heat, stretch, smooth. You want just enough tension to pull out any wrinkles or bunched-up "fingers" of material. As the vinyl cools, it sets in its new shape, giving you a permanent, perfect fit that hugs every curve of your vinyl wrap for table top.
Keeping Your New Table Surface Looking Flawless
Alright, you’ve done the hard work and your table looks incredible. So, how do you keep it that way? The good news is, it’s easier than you think. A little bit of know-how will ensure your newly wrapped surface stays as a durable and stylish centerpiece for years.
Your go-to tool for daily upkeep is a simple microfiber cloth. For dust, fingerprints, or small spills, just dampen the cloth with warm water and a tiny bit of mild dish soap. That’s usually all it takes to get it looking perfect again.
Everyday Cleaning and Long-Term Protection
Knowing what to avoid is just as crucial as knowing what to use. Steer clear of anything abrasive—scouring powders, rough sponges, and harsh chemical cleaners with bleach or ammonia are the enemy. These can easily strip the shine or even eat away at the vinyl's protective top coat, which can lead to serious wear and tear.
Here are a few simple habits that will make all the difference:
- Spills: Get to them quickly! While the vinyl is moisture-resistant, leaving things like coffee or red wine to sit can lead to stubborn stains.
- Heat: Treat the surface like you would a fine wood table. Always use coasters for hot mugs and placemats or trivets for hot dishes. Direct heat is a no-go, as it can cause the vinyl to bubble or warp.
- Sharp Objects: Be careful with keys, knives, and other sharp items. The vinyl is tough, but it's not scratch-proof.
Think of it this way: you've just invested your time and effort into a beautiful upgrade. These small habits protect that investment, keeping the adhesive strong and the finish looking just as good as the day you applied it.
It's worth remembering that architectural films are built to last. In fact, across the Middle East and Africa, the market for self-adhesive vinyl is booming because tests show these materials can handle thousands of scratches and resist peeling from spills. This makes them perfect for busy homes.
This simple peel-and-stick solution can add 5-7 years to your furniture's life, all while giving it the look of a high-end material for a fraction of the price. You can dive deeper into these durable design solutions and see why they're becoming so popular.
Got Questions About Table Top Wraps?
It’s completely normal to have a few questions before you dive into a project like this. Even with a great guide, a little extra clarity can be the difference between feeling hesitant and feeling confident. We get these questions all the time, so we've put together answers based on what we see every day in the field.
These are real-world insights from countless projects, designed to give you that final bit of peace of mind.
How Durable Is a Vinyl Wrap on a Kitchen Table?
This is probably the number one question we hear, and for a good reason! High-quality architectural vinyl is built for the chaos of daily life. It’s tough stuff—highly resistant to scratches, moisture, and the spills that are inevitable on a kitchen or dining table.
As long as you take good care of it (think non-abrasive cleaners and always using a trivet for hot pans), your wrapped table will look fantastic for years. In fact, a well-maintained wrap can easily add another 5-7 years to your furniture's life.
Can I Get the Vinyl Off Without Wrecking the Table?
Absolutely. That’s one of the best parts about using vinyl. When you’re ready for a new look, or if you're moving out of a rental, you can remove it cleanly.
Just grab a hairdryer or a heat gun on a low setting and gently warm the surface. This softens the adhesive and lets you peel the film right off. On most factory-finished surfaces like sealed wood, laminate, or metal, it comes off without a fight and leaves little to no sticky gunk behind.
This easy reversibility is what makes architectural vinyl so powerful. It gives you the freedom to try bold designs or trendy patterns without the stress of a permanent commitment.
What if I Get an Air Bubble?
Don't panic! Air bubbles happen, even to seasoned installers. If you catch one while you're still applying the vinyl, you can usually just lift that section back up and re-smooth it with your squeegee. The adhesive is forgiving for a little while.
If you spot a bubble after the fact, the fix is simple. Take a very fine pin and make a tiny hole right in the middle of the bubble. Then, use your finger or the squeegee to gently push the trapped air out through that pinprick. On most vinyls with a bit of texture or a pattern, you’ll never even see the hole. If you're wondering how different factors play into the final cost, check out our detailed guide on vinyl wrap pricing.
When Is It Better to Hire a Pro Instead of DIY?
A DIY wrap is a fantastic weekend project for simple, flat surfaces—think a small coffee table, a desk, or a rectangular dining table. But sometimes, it's smarter to call in an expert.
If your table has lots of complex curves, decorative inlays, or is a really large or valuable piece, a professional installer is your best bet. They have the skill to handle those tricky spots and will deliver a seamless, bubble-free finish that really does justice to your furniture. It saves you the headache and guarantees an impeccable result.
Ready to give your table a stunning, durable new look without the mess of a full renovation? The expert team at ReVamp Wrap is here to bring your vision to life with a flawless, professional finish. Explore our services and get a quote today!